You scan a stack of contracts, invoices, or reports, but when you search for a keyword, nothing comes up. The PDF treats your text as a picture, not data. Hours vanish as you scroll manually. Optical Character Recognition (OCR) in Adobe Acrobat solves this by converting image-only scans into searchable, editable text. This guide walks you through preparation, execution, troubleshooting, and verification to make your PDFs fully searchable in 2026.
Table of Contents
- Prerequisites And Preparing Your PDFs For OCR
- Step-By-Step OCR Application In Adobe Acrobat
- Batch OCR Processing For Enterprise Workflows
- Common OCR Mistakes And How To Correct Them
- Expected Results And Measuring Success Of OCR Searchability
- Enhance Your Document Workflows With Our Adobe Acrobat Solutions
- Frequently Asked Questions
Key Takeaways
| Point | Details |
|---|---|
| Proper preparation boosts OCR accuracy | Scan PDFs at 200-300 dpi and remove security to avoid recognition errors. |
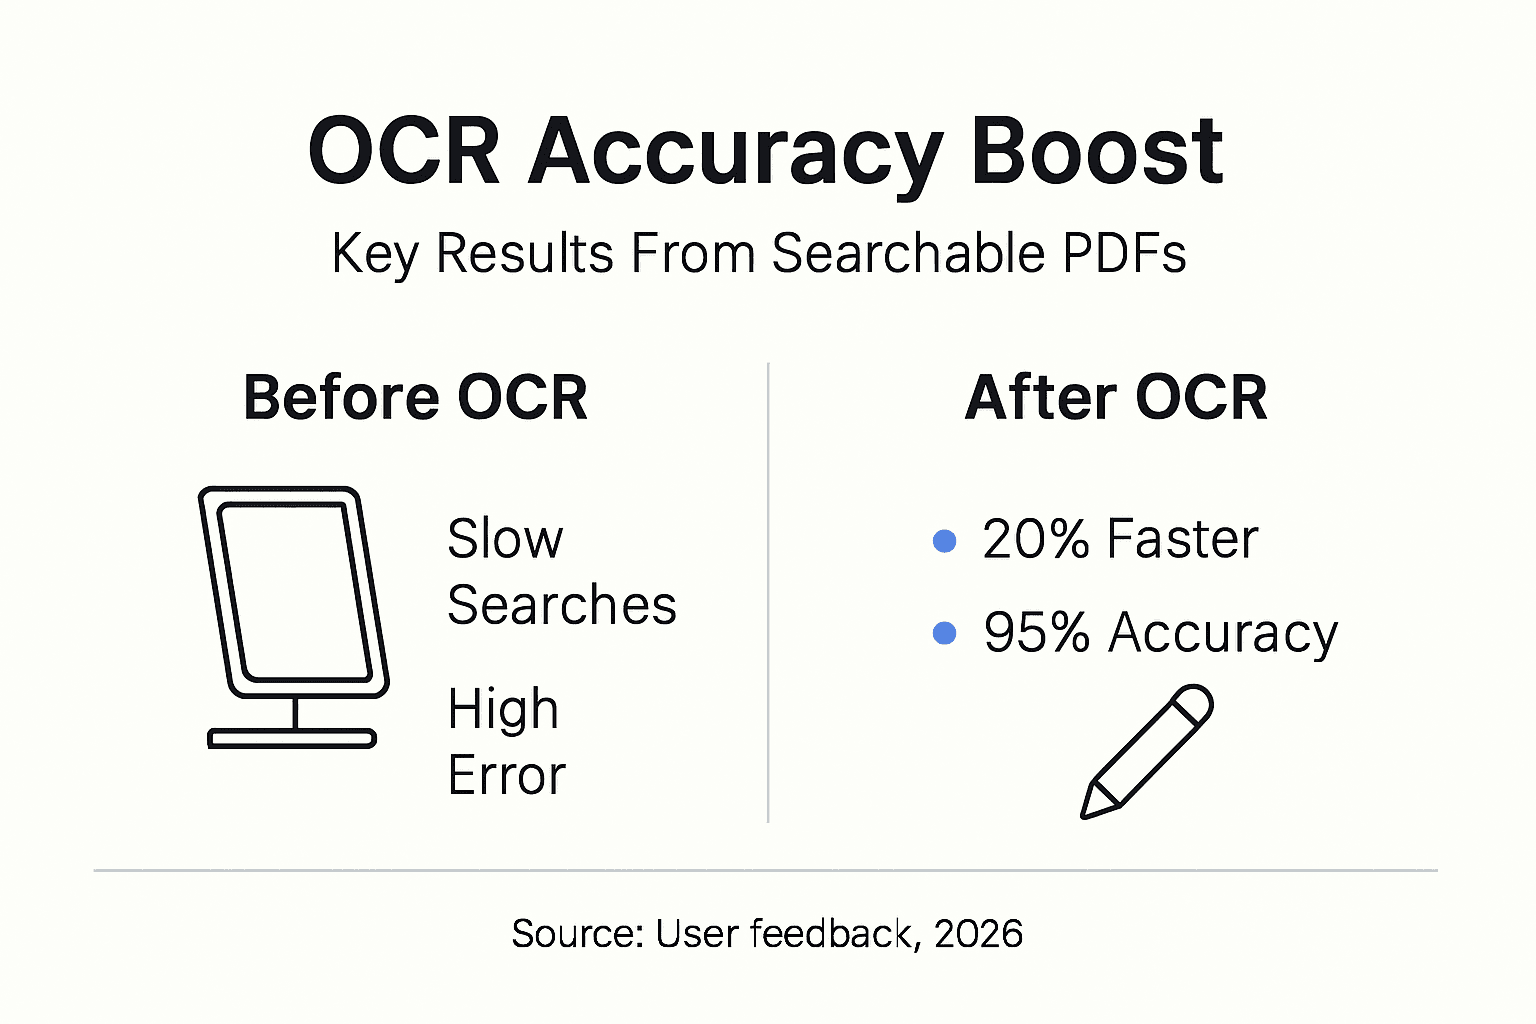
| Correct settings increase accuracy by 20% | Selecting the right language and ‘Searchable Image (Exact)’ output dramatically improves text recognition quality. |
| Batch processing cuts manual work by 70% | Automate OCR on multiple files simultaneously to handle enterprise document volumes efficiently. |
| Manual review ensures precision | Correcting OCR mistakes after processing pushes search accuracy above 95%. |
| Testing confirms success | Use Find (Ctrl+F) and text selection to verify OCR worked and monitor file size impacts. |
Prerequisites and Preparing Your PDFs for OCR
Before you run OCR, prepare your environment and files to avoid wasted time and poor results. Skipping this step is like building on sand: the foundation crumbles under scrutiny.
You need Adobe Acrobat Pro DC or a newer version with full OCR capabilities. The standard Reader won’t cut it for recognition tasks. Adobe Acrobat’s OCR requires properly scanned PDFs at 200-300 dpi and non-secured files for best results. Check your scanner settings before creating PDFs. Many offices default to 150 dpi or lower, which produces blurry text and increases error rates.
Verify your PDF is image-only by trying to select text with your cursor. If nothing highlights, the file needs OCR. Password-protected or encrypted PDFs block OCR processing entirely, so remove security settings first. Always back up originals before any conversion; OCR alters the file structure permanently, and reverting without a backup is impossible.
Key preparation steps:
- Install Adobe Acrobat Pro DC or higher
- Scan documents at 200-300 dpi resolution minimum
- Ensure PDFs have no password protection or encryption
- Test text selection to confirm image-only status
- Create backup copies of all original files
Pro Tip: Keep a dedicated folder for pre-OCR files and another for processed versions. This habit prevents accidental overwrites and lets you compare results. If you’re scanning and converting documents with Adobe Acrobat, use the correct color mode: grayscale for text documents saves space without sacrificing OCR quality.
For enterprises managing thousands of scans, standardizing resolution and file naming conventions upstream saves hours during batch processing. Consult the Adobe Acrobat OCR official guide for detailed scanner compatibility and troubleshooting.
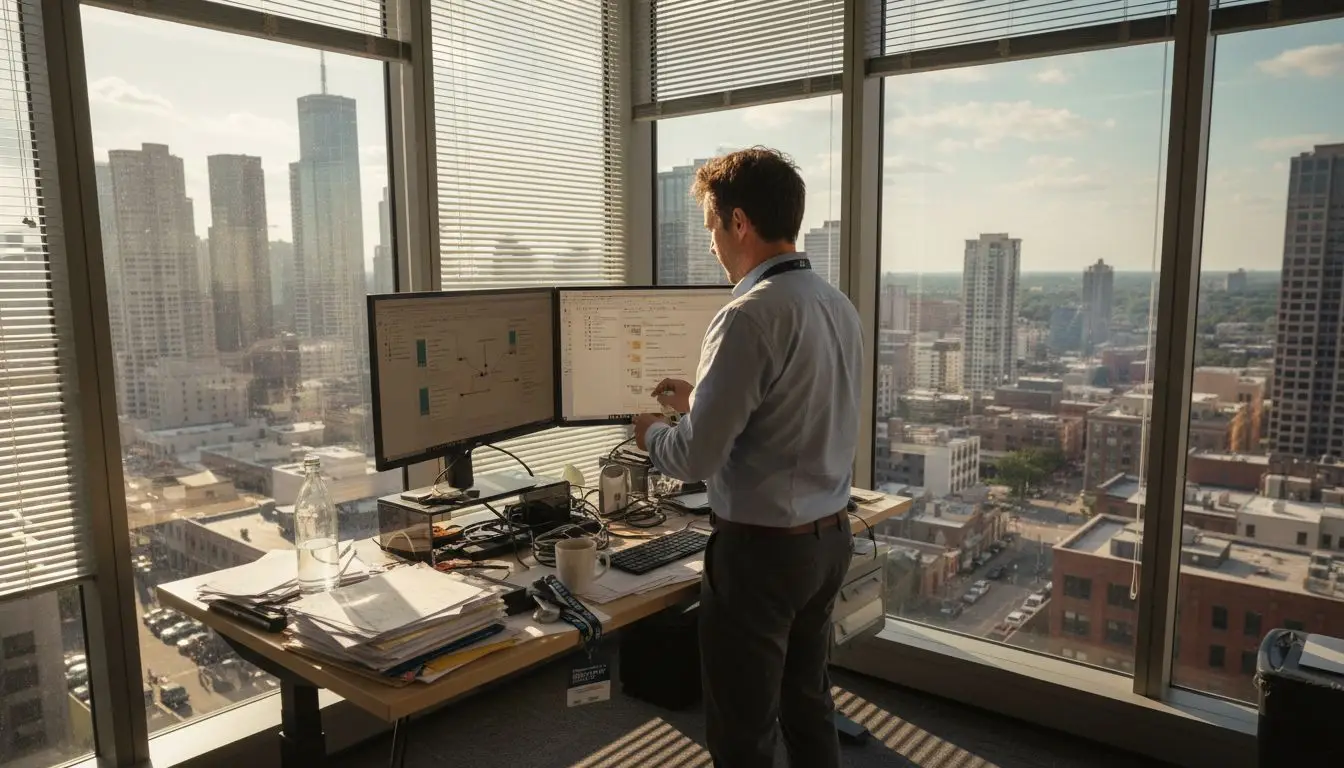
Step-by-Step OCR Application in Adobe Acrobat
With preparation complete, you’re ready to transform image-only PDFs into searchable documents. Adobe Acrobat’s OCR converts image-only scanned PDFs into searchable, editable text layers while preserving document appearance. Follow these steps precisely to ensure clean results.
Step 1: Open your scanned PDF in Adobe Acrobat Pro DC. Wait for the file to load fully; large files may take a moment.
Step 2: Navigate to the Tools pane on the right side. Click Scan & OCR, then select Recognize Text. If the option is grayed out, your PDF may already contain text or be protected.
Step 3: Choose the document language from the dropdown menu. This setting is critical: wrong language selection can drop accuracy by 15% or more. For multilingual documents, run OCR separately on each language section.
Step 4: Select your output style. Optimal OCR accuracy requires setting the document language and using ‘Searchable Image (Exact)’ PDF output style to preserve layout and readability, improving accuracy by up to 20%. This option places invisible text behind the original image, maintaining visual fidelity while enabling search and copy functions. Editable Text output converts the entire page to selectable text but may alter formatting.
Step 5: Click Recognize Text and wait. Processing time varies by file size and complexity. A 50-page document typically takes 2-5 minutes.
Step 6: Save the file with a new name or overwrite the original if you kept a backup. Test immediately by pressing Ctrl+F (Windows) or Cmd+F (Mac) and searching for a known keyword.
Pro Tip: After OCR, use the Edit PDF tool to spot-check recognized text. Click into a paragraph and look for garbled characters or missing words. These indicate areas needing manual correction. Adobe’s tools let you edit text directly within the PDF interface.
For detailed instructions on how to apply OCR in Adobe Acrobat step-by-step, including screenshots and advanced settings, review the Adobe OCR tools overview. Adjust OCR settings to optimize accuracy based on your document type: invoices benefit from different parameters than contracts or forms.
Batch OCR Processing for Enterprise Workflows
Processing one PDF at a time wastes resources when you’re handling hundreds or thousands of scans. Batch OCR processing in Adobe Acrobat can process dozens of PDFs in one session with custom output folder and naming options, improving productivity significantly. Enterprise IT teams rely on this feature to maintain digitization pipelines without hiring extra staff.
Open Adobe Acrobat and go to Tools > Action Wizard. Create a new action and add the Recognize Text step. Configure language and output style as you would for a single file, then save the action with a descriptive name like “Batch_OCR_English_SearchableExact.”
Key batch processing steps:
- Create a dedicated input folder with all scans ready for OCR
- Define output folder and file naming rules (append “_OCR” or use timestamps)
- Run the saved action on the entire folder
- Monitor progress in the Action Wizard status window
- Verify random samples from the output folder for quality control
Workflow automation with batch OCR can reduce manual effort by up to 70% in document-heavy workflows. Instead of an employee spending two days processing 500 invoices, the computer handles it overnight. Your team focuses on exceptions and quality assurance rather than repetitive clicking.
Pro Tip: Test your batch action on a small subset (10-20 files) before running it on thousands. This catches configuration errors early. Set your computer to prevent sleep mode during long batch runs to avoid interruptions.
For organizations needing to scale beyond Acrobat’s built-in tools, consider batch processing PDFs to automate workflows with enterprise plugins. Efficient batch processing of PDFs integrates with document management systems and supports custom scripting for complex routing rules. Review Adobe’s guidance on batch OCR processing in Adobe Acrobat for performance tuning and troubleshooting.
| Workflow Stage | Manual Processing Time | Batch OCR Time | Time Saved |
|---|---|---|---|
| 100 invoices | 5 hours | 45 minutes | 85% |
| 500 contracts | 25 hours | 4 hours | 84% |
| 1000 forms | 50 hours | 8 hours | 84% |
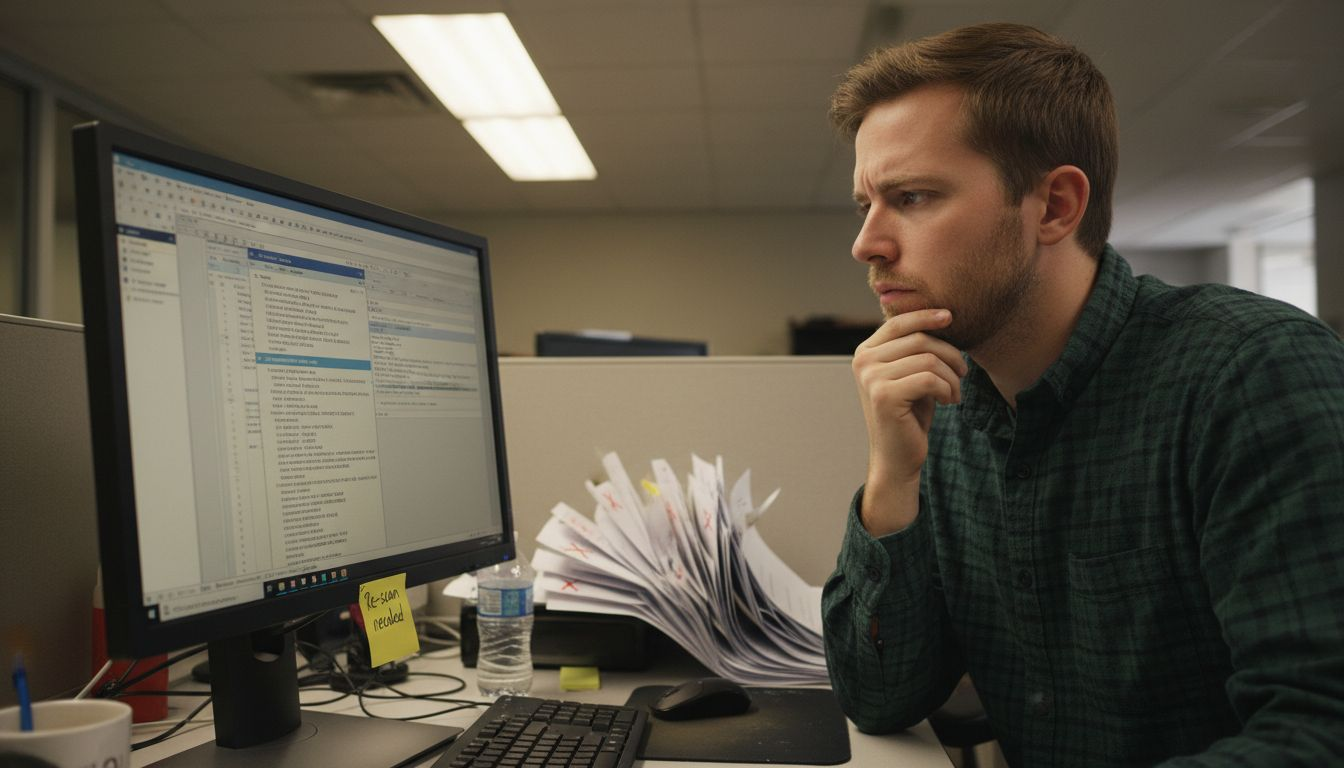
Common OCR Mistakes and How to Correct Them
Even with careful preparation, OCR produces errors. OCR error rates vary from 2% to over 15% depending on scan quality and settings; manual review and correction are critical to improve accuracy. Understanding common pitfalls helps you catch and fix issues before they disrupt workflows.
Low resolution is the leading cause of poor OCR. Scanning below 200 dpi creates blurry text that confuses recognition algorithms. If you inherit low-quality scans, rescan the originals rather than trying to salvage unusable files. Rescanning takes less time than correcting hundreds of garbled characters.
Language mismatches rank second. If you process a Spanish document with English OCR settings, expect nonsense output. Always double-check the language dropdown before clicking Recognize Text. For multilingual documents, segment pages by language and run separate OCR passes.
Complex fonts and handwriting degrade accuracy. Decorative typefaces, cursive scripts, and handwritten notes frustrate even advanced OCR engines. Manually reviewing OCR results and correcting text with Adobe’s built-in tools boosts search accuracy to 95%. Use the Edit PDF tool to fix misrecognized words: click into the text, delete the error, and retype correctly.
Common correction scenarios:
- Replace “rn” misread as “m” (common with sans-serif fonts)
- Fix numeric transpositions like “0” read as “O”
- Correct spacing errors where words run together
- Add missing punctuation that affects search behavior
- Verify proper nouns and technical terms spelled correctly
Pro Tip: Create a custom dictionary in Adobe Acrobat for industry-specific terms and product names. This reduces repeat errors across multiple documents. If a particular scan quality issue persists, consider correcting OCR errors with specialized plugins that offer advanced character recognition for challenging documents.
For persistent problems, run OCR again with adjusted settings. Sometimes a second pass with different output style resolves stubborn errors. Consult Adobe’s troubleshooting on common OCR mistakes and corrections for advanced techniques. Enterprises should document frequent error patterns and train staff on OCR text correction techniques to maintain quality standards.
Expected Results and Measuring Success of OCR Searchability
How do you know OCR succeeded? Testing confirms your PDFs are truly searchable and usable. Users report over 95% search accuracy after manual correction and verification of OCR results. Establish clear success metrics to justify the time and resources invested in digitization.
Start with the simplest test: open a processed PDF and press Ctrl+F (Windows) or Cmd+F (Mac). Type a keyword you know appears in the document. If the search highlights the term, OCR worked. Repeat with several keywords, including uncommon words and numbers. This catches partial failures where only some pages processed correctly.
Using the Find command and text selection confirms OCR success and document usability post-processing. Try selecting text with your cursor: click and drag across a paragraph. If text highlights and you can copy it, the invisible text layer is intact. If nothing happens, OCR failed or the wrong output style was used.
Success verification checklist:
- Search function returns accurate results for multiple keywords
- Text selection works across all pages
- Copied text pastes correctly without garbled characters
- File size increased reasonably (typically 10-30% for searchable image)
- Document appearance remains unchanged from original scan
Monitor file size to ensure OCR doesn’t bloat your storage. Searchable Image output adds minimal overhead, usually 10-20% of the original size. If file size doubles or triples, you may have accidentally used Editable Text output or applied incorrect compression settings.
Track user feedback for qualitative measures. Can your team find information faster? Do support tickets about “can’t locate document” decrease? Quantify time saved: if employees previously spent 15 minutes manually locating data in a 200-page report, and now find it in 10 seconds, that’s measurable ROI.
| Metric | Before OCR | After OCR | Improvement |
|---|---|---|---|
| Avg. search time per document | 8 minutes | 15 seconds | 97% faster |
| Documents found on first try | 65% | 98% | 51% increase |
| User satisfaction score | 6.2/10 | 9.1/10 | 47% higher |
For systematic quality control, implement testing and verifying OCR accuracy protocols. Sample 5-10% of processed files randomly and manually check against originals. Document error patterns and feed findings back into your preparation and correction workflows. Adobe provides detailed guidance on verifying OCR results and measuring OCR success at enterprise scale.
Enhance Your Document Workflows with Our Adobe Acrobat Solutions
You’ve mastered OCR basics, but scaling these processes across thousands of documents demands specialized tools. Mapsoft streamlines enterprise PDF workflows with plugins and automation platforms designed for Adobe Acrobat environments.

Our solutions integrate seamlessly with your existing infrastructure. PDF batch processing to automate your workflows handles high-volume OCR, conversions, and quality checks without manual intervention. Set rules once and let the system process overnight or during off-peak hours. IT teams reduce ticket backlogs by 60% when repetitive PDF tasks run automatically.
Explore advanced PDF editing techniques in Adobe Acrobat to extend OCR with metadata enrichment, automated redaction, and compliance tagging. Combine OCR with workflow routing: searchable invoices trigger approval chains, contracts populate databases, and forms feed analytics dashboards. Automate enterprise PDF document workflows end-to-end, from scan to archive, with minimal human oversight.
Frequently Asked Questions
What resolution should scanned PDFs have for optimal OCR?
Scan at 200-300 dpi minimum for reliable OCR results. Higher resolution (400-600 dpi) helps with small fonts or degraded originals but increases file size and processing time. Balance quality and practicality based on your document types.
Can I batch process hundreds of PDFs using Adobe Acrobat OCR?
Yes, Adobe Acrobat’s Action Wizard allows batch OCR on entire folders. Create a custom action with your preferred settings and run it overnight for large volumes. Enterprise plugins extend this further with scheduling and error handling.
How do I fix OCR errors in searchable PDFs?
Use Adobe Acrobat’s Edit PDF tool to manually correct misrecognized text. Click into the problematic area, delete errors, and retype correctly. For systematic issues, adjust OCR settings and reprocess the file. Learn more about PDF OCR software optimization for advanced correction techniques.
Will OCR increase my PDF file size significantly?
Searchable Image output typically adds 10-30% to file size by creating an invisible text layer. Editable Text output may increase size more depending on font embedding. Use PDF optimization tools after OCR to compress without losing searchability.
How can I verify if OCR was successful on my PDF?
Press Ctrl+F (Windows) or Cmd+F (Mac) and search for known keywords. Try selecting text with your cursor across different pages. If both work smoothly and copied text is accurate, OCR succeeded. Random sampling of 5-10% of batch processed files ensures quality at scale.